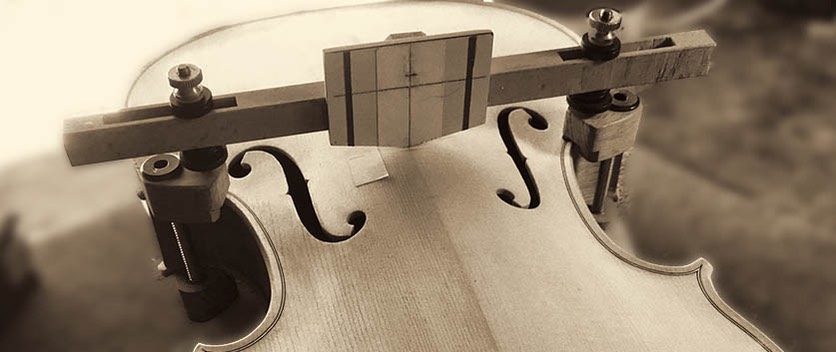
Setting the neck in violin, viola or cello is probably the most challenging task in the entire making or repair process. The maker or repairman has to make a tight fitting joint (in 3 planes) while simultaneously arriving at the correct final destination for at least a half dozen different measurements. An accurate, stable target for the bridge location makes the job easier. For many years, I just used a bridge with some lines drawn on it. If the arching was distorted, sometimes the dummy bridge and guide lines weren’t really ending up being where you wanted them. In addition, you had to place the bridge accurately, in the same place, each time you wanted to check how things were going. A jig that could be fixed securely to the instrument and adjusted to compensate for distortions and twists seemed like a much better solution.
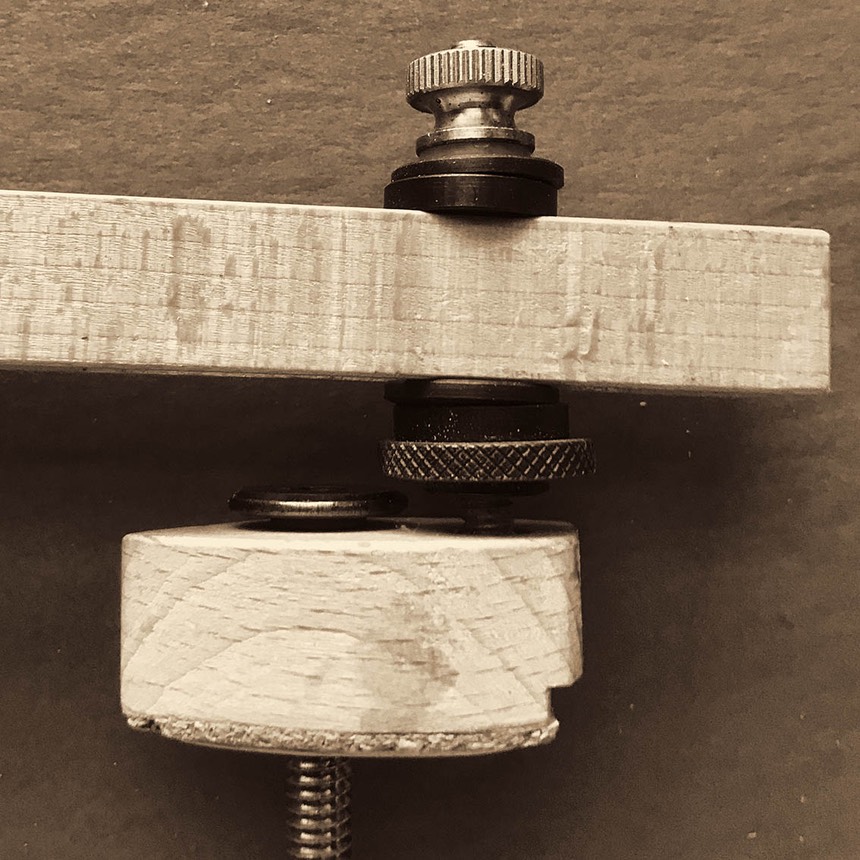
After seeing some descriptions of these jigs and several versions that colleagues had made, I decided I ought to make one myself. I wanted it to be easily adjustable but not too complicated. I made my jig so it would come apart and be attached to the instrument in two stages- a set of parts that clamp to the instrument and a section that holds and adjusts the target. The one major innovation I made compared to many of the jigs I had seen, was the inclusion of conical washers (which could be incorporated easily into most of their designs).
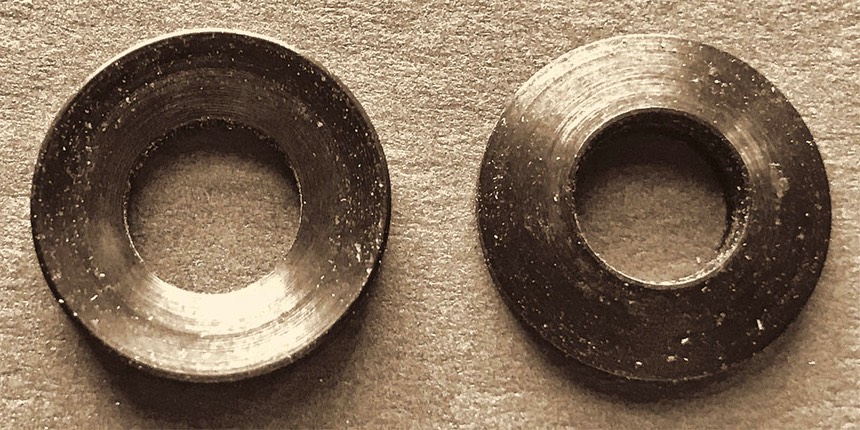
Conical washers allow the cross bar holding the target to be tightened securely to the upright sections without them having to be perpendicular to each other. This allows you to securely set the target jig just the way you want it on instruments that have distorted rib structures and arching. The washers can compensate for a fairly wide degree of angle difference between the 2 upright posts.